Build Your Own Responive Web App
Step 3: Express Router and Updating your Routes and Views
Welcome everyone to step 3 in our quest to build you a responsive web app. If you have not completed Step 1 or Step 2 I would highly advise starting there since the code you will see on this step and anything going forward is based off that code. This step is an important stage in your app since it starts organizing your app in the pattern you would see a developer do in the real life. We are going to introduce the concept of the Express Router, how we have to organize our file tree to maximize the router, and then create the additional views files and folders to make our dynamic routes really work for you. This will start getting technical so if you need to copy and paste code from this tutorial to ensure there are no spelling errors please do so for accuracy. Lets get started and introduce you to some new code!
Creating Routes and Views Directories
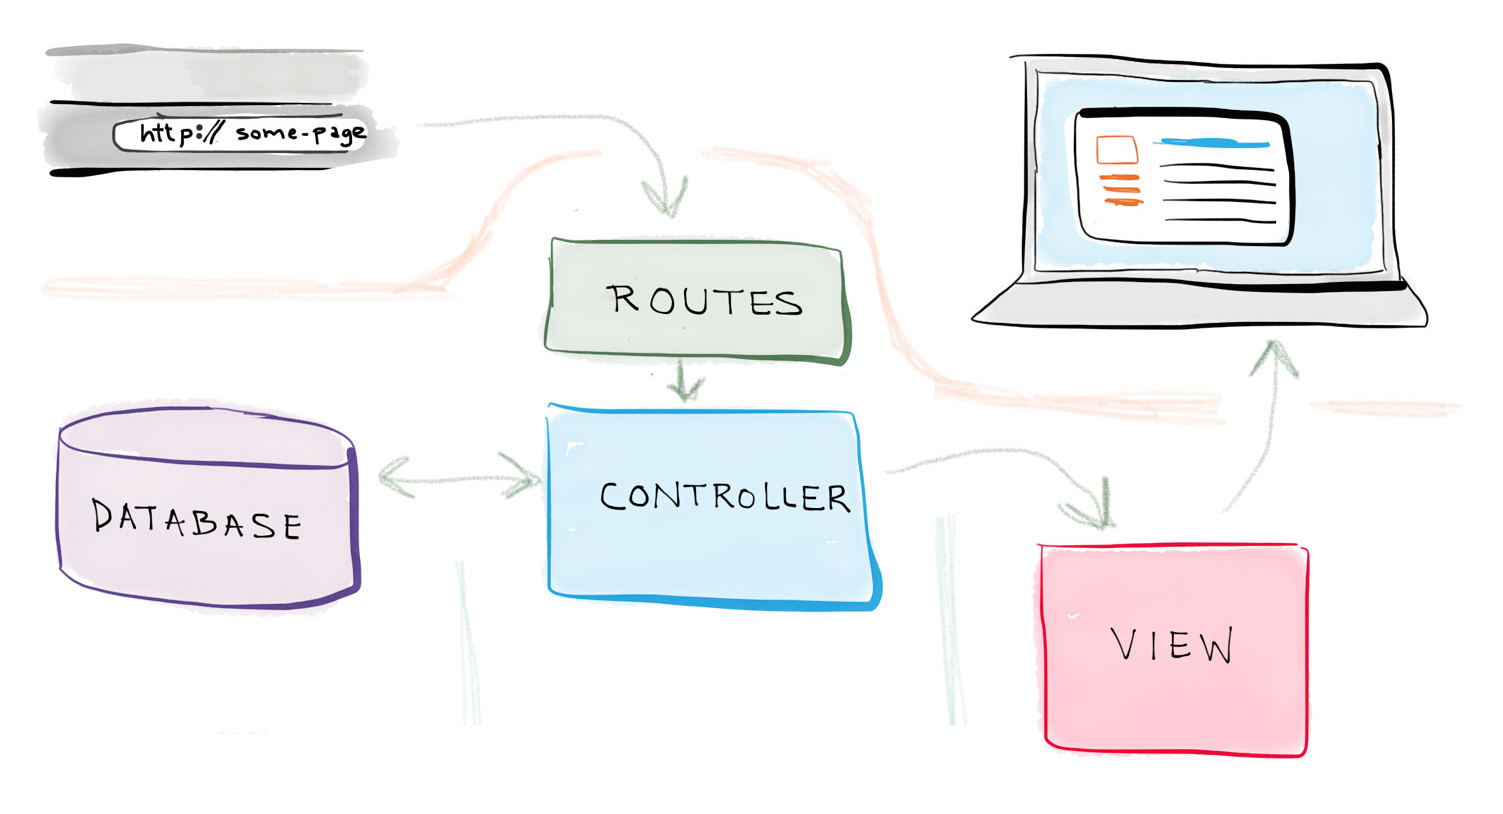
The first step in this process to making your web app be more responsive to your users is having a proper route structure that lets you clearly define your RESTful routing that we started diving into in the last blog post. I am going to create a route for each page that we did in our original app.js, so we are going to have 4 routes: Index, Contact, Services, and About. We need to make a new folder directory in our folder tree first, then add the route files, and lastly we will circle back to the views and add the proper folders and files there. Lets get into the code.
Like the start of last section, lets make a copy of the v2 folder and then rename the copy v3 so you can roll back your versions if you make an edit and can't place where the issue is. Make sure you also have your two terminals open at the bottom of the screen right now before we start creating the directories in v3. You are going to need one in a minute to start your mongoDB when we test our completed routes and views, and in the second terminal we are going to jump into the v3 folder with cd v3 (if you are still in your v2 folder it takes 2 lines cd .. and then cd v3). Now that we are here, lets add the route folder and the directories that you app will use.
                                mkdir routes

                                touch routes/index.js routes/contact.js routes/about.js routes/services.js
You can see that we have a routes folder at the root of your folder tree and the corresponding files for the different routes that your app will hit in the process of your users requests. So lets now go add the views that the user will see based on your route requests. We need to create the folders contact, services, and about (your landing page does not need its own folder). so hit your command line with
mkdir views/contact views/services views/about
index.ejs and thank-you.ejs, for services you will have index.ejs, show.ejs, edit.ejs, create.ejs, for about you will have index.ejs. I bet you are wondering why in the world do you have an index.ejs in each of the files and you don't name them separately? The reason is that express will default to your index.ejs as the main file of the route tree if it is not otherwise speficied. Now, lets go make those files in our terminal.
                                touch views/contact/indes.ejs views/contact/thank-you.ejs

                                touch views/servives/index.ejs views/services/show.ejs views/services/edit.ejs views/servies/create.ejs

                                touch views/about/index.ejs
The last step in the process or getting things organized is installing a few NPM dependencies into our system to make our lives a little easier and more functionable in the coming steps. We are going to install Nodemailer, Express-Sanitizer, body-parser, and method-override to our system. Nodemailer is a great dependency that will send us an email from our contact form, Express-Sanitizer disallows any script tag from being inserted into your forms (greatly important and understated!), body-parser collects the data from individual form fields, and method-override allows us to put a put request in with a POST verb.
We can install all of these dependencies with one line of code, so lets put that in the terminal now
npm install nodemailer body-parser express-sanitizer method-override --save
Express Router
Alright, now that we have our routes defined and ready to go its time to using the power of Express and the Express Router to our benefit.
Why the Express Router? My main goal with this is to make this application look and feel as similiar as a client would expect in the real work, AND to keep the app.js file solely for configurations, route and model locations, and your port route. The Express Router lets you create small mini apps inside your big app to only have the necessary requirements for that route included to not bloat your app. Our syntax for defining routes is going to change slightly, but the big change is the last line of every file that lets the router compile your information for your main app.js file. All of our files will start with this template:
                                //REQUIREMENT STATEMENTS

                                var express     =   require("express");

                                var router      =   express.Router();


                                //YOUR ROTUES WILL GO HERE


                                //ROUTER EXPORT

                                module.exports = router;
How Does the Route Syntax Change? Two subtle changes happen: First, we have to use router.VERB (get, post, etc) instead of app.VERB to call any route that we want inside our route file, and two we have to direct the views to the diretory first Views/file. So our syntax for our about page would be this:
                                //REQUIREMENT STATEMENTS

                                var express     =   require("express");

                                var router      =   express.Router();


                                //GET ABOUT PAGE

                                router.get("/", function (req,res){

                                   res.render("contact/index")

                                });


                                //ROUTER EXPORT

                                module.exports = router;
index.ejs inside of the contact folder nested inside of your views directory. Express will then render the index.ejs file back to the user on your site. To circle back to the first step in this post, you can see why there is an index.ejs in every views template folder. When a user request hits the parent level of the route directory (about here), Express doesn't have to display the file name at the end of the request since it is the default name. Lets take the trining wheels off, and set up the core routes to direct our users to the proper views templates.
Index.js Route
                                //REQUIREMENT STATEMENTS

                                var express     =   require("express");

                                var router      =   express.Router();


                                //GET LANDING

                                router.get("/", function (req,res){

                                   res.render("index")

                                });


                                //ROUTER EXPORT

                                module.exports = router;
This one is simple, but slighly different from the About.js file we will cover next. You see the last line of res.render("index"); that there is no folder prefix. That is becasue we are going to leave our landing index.ejs file directly under the views folder. Simple, sweet, and directly to point. You will see with this index route as we go forward that login,register and other logic will land here to help your app.js handle middleware faster.
About.js Route
                                //REQUIREMENT STATEMENTS

                                var express     =   require("express");

                                var router      =   express.Router();


                                //GET ABOUT
                                router.get("/", function (req,res){

                                   res.render("about/index")

                                });


                                //ROUTER EXPORT

                                module.exports = router;
This is easiest one since we only have to show one page on this route. As you can see we use the HTML verb GET to respond (res) to the request (req) of /about from a user. It then goes to your views template and finds the index.ejs in the about directory to render to the user.
Contact.js Route
This one is more complex as we start adding in the different HTML verbs into the routes. You will see the POST route aded in for the first time. That route contains some very specific code that I have taken from NodeMailer's Example and customized to make it perfect for your site. I use body parser to get the data out of the form and assign it variables with express sanitize layered over body-parser to filter out any unexpected scripts that a malicious user might have tried to slip in. I then use those variable to write the message in the mailOptions formula. Lets see the whole page with require statments and the router export.
//REQUIREMENT STATEMENTS
var express = require("express");
var router = express.Router();
//GET Contact
router.get("/", function(req, res){
res.render("contact/index");
});
//POST THE FORM
router.post("/", function (req, res){
var name = req.sanitize(req.body.name);
var subject = req.sanitize(req.body.subject);
var email = req.sanitize(req.body.email);
var message = req.sanitize(req.body.message);
console.log(req.body);
// SET UP FOR GMAIL- SEE NODEMAILER FOR EXACT SMTP INSTRUCTIONS
let transporter = nodemailer.createTransport({
host: 'smtp.gmail.com',
port: 587,
secure: false, // true for 465, false for other ports
auth: {
user: "yourEmail@domain.com", // user
pass: "yourPassword" // password
}
});
// setup email data with unicode symbols
let mailOptions = {
from: email, // sender address
to: 'yourEmail@domain.com', // list of receivers
subject: subject, // Subject line
html: 'NEW MESSAGE
' + name + '
' + email + '
' + message // html EMAIL body
};
// send mail with defined transport object
transporter.sendMail(mailOptions, (error, info) => {
if (error) {
return console.log(error);
}
console.log('Message sent: %s', info.messageId);
console.log('Preview URL: %s', nodemailer.getTestMessageUrl(info));
res.redirect("/contact/thank-you");
});
});
//GET THANK YOU PAGE
router.get("/thankyou", function(req,res){
res.render("contact/thank-you");
});
//ROUTER EXPORT
module.exports = router;
Services.js Route
This section I am only going to define 2 of the 6 routes on this page, since the last 4 routes require specific MongoDB code that would consfuse you if I just put them up right now. In step 4, we will go back and complete the routes with the necessary code so you can see how the router talks to both your database and the server before displaying information based on your user's request. Lets see what we are going to have in the file now:
                                //REQUIREMENT STATEMENTS

                                var express     =   require("express");

                                var router      =   express.Router();

                                var Services    =   require("../models/services");


                                // GET Services

                                router.get("/", function(req,res){

                                   // MONGO DATA HERE NEXT TIME

                                   res.render("services/index");

                                });


                                // GET CREATE (NEW SERVICE) PAGE

                                router.get("/create", function(req,res){

                                   // MONGO DATA HERE NEXT TIME

                                   res.render("services/create");

                                });


                                //CREATE NEW SERVICE


                                // GET EDIT PAGE


                                // PUT UPDATE


                                // SHOW PAGE


                                //ROUTER EXPORT

                                module.exports = router;
The one line that is really different here is the requirement statement to bring in the Services model from MongoDB: var Services = require("../models/services");. You will also notice that the pre-code the location of the model is now ../ instead of the ./ that we have used in the partials in the past. The ../ tells your nodeJS environment to go up one level in the directory tree before it begins looking for the folder that you reference. You will see this again in our partials updates when we update the HTML in the views files. Lets start migrating that now in the next step.
Adding HTML To New Views Files
Convert Old EJS Templates: We are going to copy our existing template files into their new index.ejs files in the proper view folder. This way we can get 2/3 of our work done quickly and only have to build a few smaller files by hand. So, your current services.ejs should get pasted into the index.ejs inside of the views/services folder, your about.ejs should get pasted into the index.ejs inside of the views/about folder, and your contact.ejs should get pasted into the index.ejs inside of the views/contact folder. The only file we are not touching is our original index.ejs file that is our landing page. We want that to stay where it is. Once you have copied the code over you can delete the original ejs templates that we made as we no longer will need them (they were primarily there to test your basic routes and set up the HTML layouts).
Update your Include Statements: Now that we have new folder locations, the folder directory location has changed in relationship to your newe files. in all of your include statements you currently have <%include ./partials/header.ejs %> which is telling your system to look at the same file level and find the partials folder there. If you started up your app with node app.js you would get hit with an error saying the partial can't be located. The fix is really simple, just change your include statment to now be <%include ../partials/header.ejs %> (the exact same for footer files) and you are good to go. You just swapped out the ./ prefix for the ../. You should recognize now that .. means up one level in the file directory since we have used that exact code in our command line with cd to move up a level.
Additional HTML: I have created a code-pen for everyone that has the next few pages of HTML content ready to be copied and pasted into the corresponding file. Make sure you copy and past the code into the right files. You will notice that the show file has an extremely small amount of HTML becasue we are going to almost reconfigure that page with the MongoDB code in the next lesson so styling it now would be a waste of your time. I also, added a footer with a copyright on it as a starter for you.
Configure Your App.js File
Now that we have the routes organized in our file tree we have to tell our app.js file a few important pieces of information so we can run our app correctly. The first is we have to define our models location. We need to add a few requirement statements to direct the app to know that we have new dependenceis we installed this step.
                                // REQUIREMENTS

                                var express         = require("express"),

                                   app             = express(),

                                   bodyParser      = require("body-parser"),

                                   mongoose        = require("mongoose"),

                                   methodOverride  = require("method-override"),

                                   nodemailer      = require("nodemailer"),

                                   expressSanitizer= require("express-sanitizer");
                                // MODELS

                                var Services        = require("./models/services"),

                                   Users           = require("./models/users");
                                // ROUTES LOCATIONS

                                var indexRoutes     = require("./routes/index"),

                                   contactRoutes   = require("./routes/contact"),

                                   aboutRoutes     = require("./routes/about"),

                                   servicesRoutes  = require("./routes/services");
/services before any view is rendered. To follow this example, if we wanted to create a new service it would follow the pattern of /service/create to load you the for to create a new service. Lets get that code installed in our app.js file now.
                                // ROTUES INDEX

                                app.use("/", indexRoutes);

                                app.use("/contact", contactRoutes);

                                app.use("/about", aboutRoutes);

                                app.use("/services", servicesRoutes);
                                // SETUP

                                mongoose.connect("mongodb://localhost/goodfellas");

                                app.use(express.static(__dirname + "/public"));

                                app.set("view engine", "ejs");

                                app.use(express.json());

                                app.use(expressSanitizer());

                                app.use(methodOverride("_method"));

                                app.use(bodyParser.urlencoded({extended: true}));
Alright, that will wrap up the app.js update that we needed to do. In review, we totally refactored our routes files so that we can use the Express Router to handle our users requests, we updated a ton of HTML in or views files to give our site a realistic path of operation, and we updated our app.js file to inclue all our new dependencies, route information as well our MongoDB Models. Thanks for reading Step 3 of this series and I look forward to the really big Step 4 of Authentication, Authorization and Connecting MongoDB information to your routes.


