Build Your Responsive Web App
Step 4: Authorization, Authentication, Connecting MongoDB
Hello everyone, and welcome back to the most challenging part of this series. If you have not completed Step 1, Step 2, and Step 3, please go do that now as this code is very specific to what we have written in those steps. This is the biggest step we will take as we really start showing the power of MongoDB, middleware and how we the Express Router (we installed last post) handles the information. We are going to cover a lot in this step, so please recognize that we might make 3 or 5 versions of our app to make sure that you have a fallback point if you code breaks along the way. Lets get coding!
Definitions and Dependencies
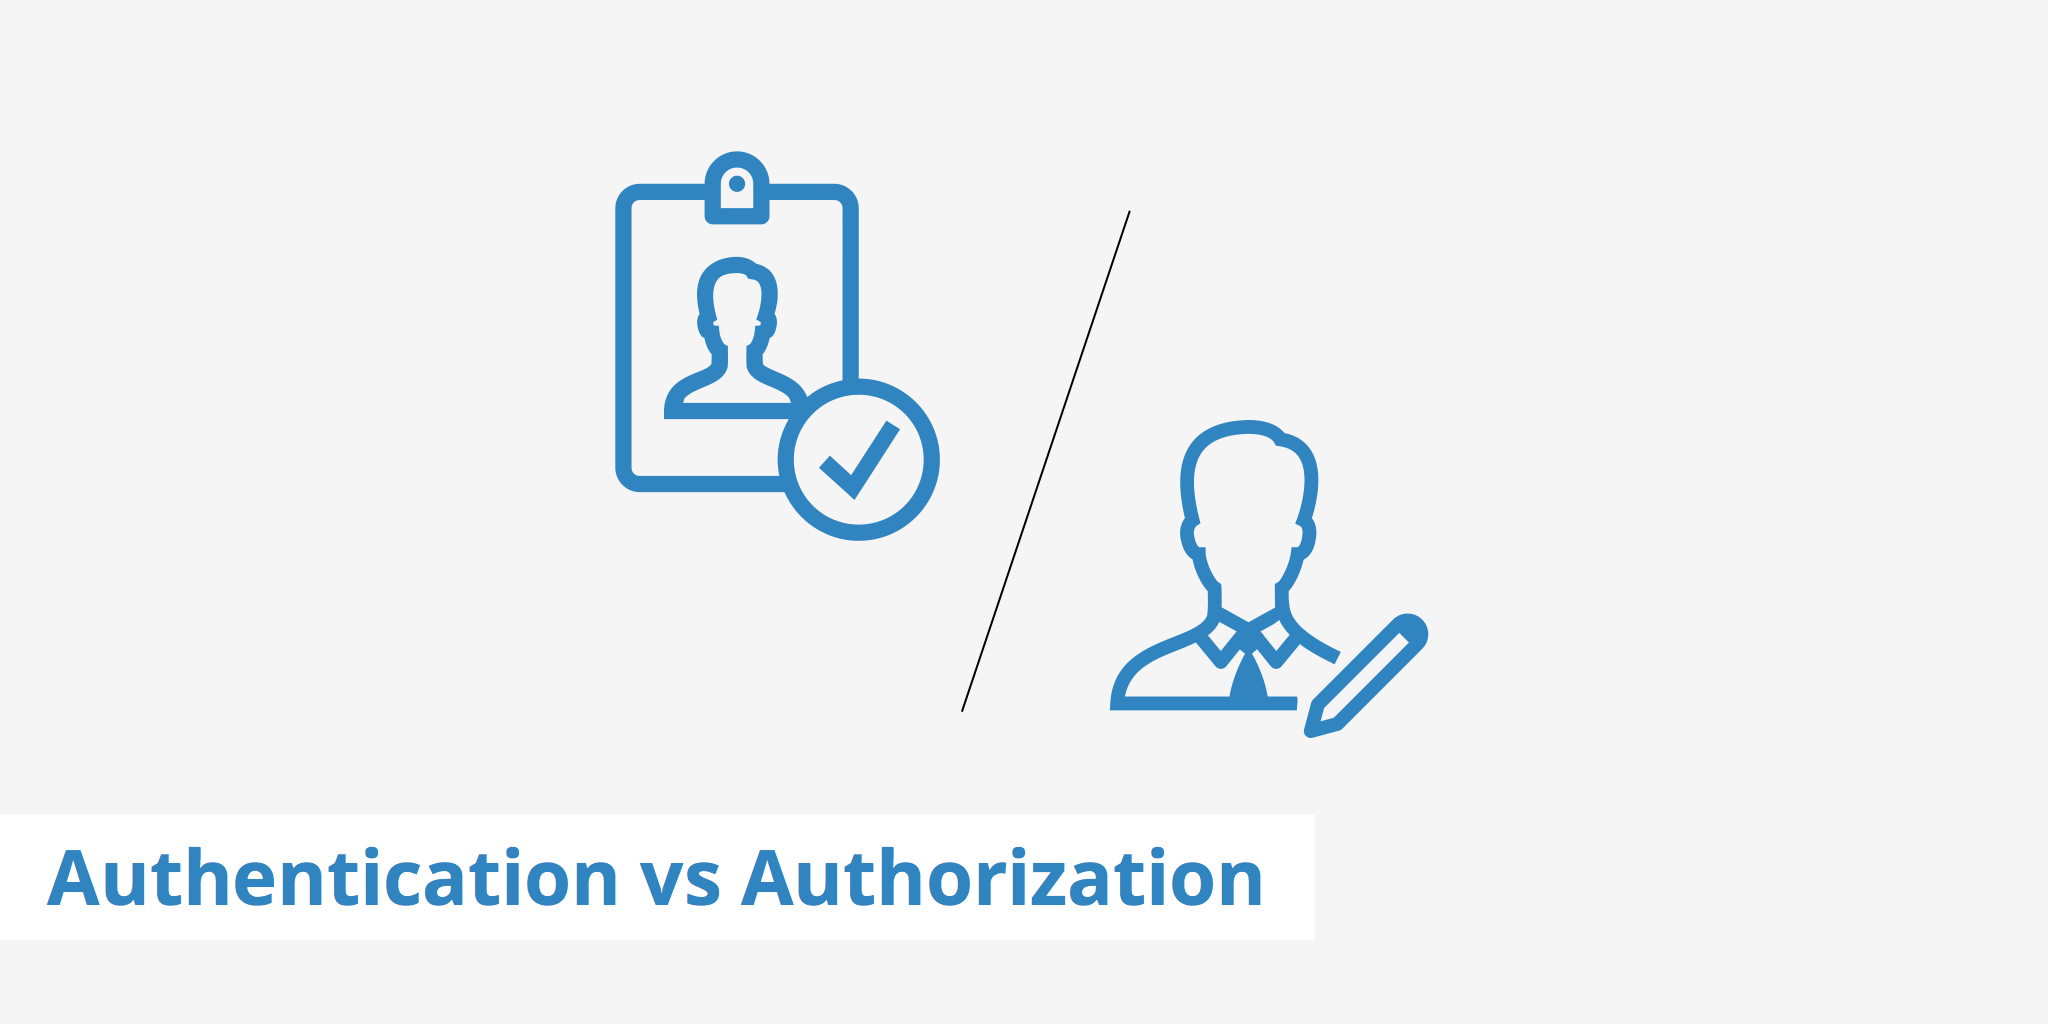
Authentication vs Authorization
Authentication is the practice of identifying who the user is that is visiting your site. It could be me, it could be you, but we need to find a way to identify people so that you can serve specific data to them... that is the whole point of making this site dynamic. We are going to do this with a wonderful resource called Passport.js that is very secure and respected. We are going to use the specific methods of Passport-Local and Passport-Local-Mongoose to verify our users that sign in to our app.
Authorization is the practice of telling someone what they can, or cannot, do inside your site after they have been authenticated as a specific user. We will do this by adding middleware that will block off certain pages to anyone who is not logged into your website. This is a great practice to learn so you can allow multiple different user levels, after you have authenticated your users.
What Dependencies Do We Need?
Like we said above we need to install 3 dependencies to make sure that we can authenticate our users. They are passport, passport-local, passport-local-mongoose and express-session. If you have not installed mongoose yet, make sure that you run npm install mongoose --save before running this next block of code in your terminal (please copy and paste this code as the dashes and spaces are required).
npm install passport passport-local passport-local-mongoose express-session --save
Require Statements and Passport Setup
Now that we have the dev dependencies installed in our package.json file, lets add them in the app.js file so our site can use them. We need to update our requirement statements to include all of these items:
                                // REQUIREMENTS

                                var express         = require("express"),

                                    app             = express(),

                                    bodyParser      = require("body-parser"),

                                    mongoose        = require("mongoose"),

                                    methodOverride  = require("method-override"),

                                    nodemailer      = require("nodemailer"),

                                    expressSanitizer= require("express-sanitizer"),

                                    passport        = require("passport"),

                                    LocalStrategy   = require("passport-local");
You can see that we have installed passport and passport-local with passport-local having the variable name LocalStrategy. This is important because we are about to code the setup that will allow the different passport packages the ability to identify users, then pass the information about the user between the packages to make your site secure. The code below should be placed in your app.js file directly under our last app.use statement (in my case that is app.use(expressSanitizer());, just make sure you dont interrupt your variable declaration).
                                // PASSPORT LOGIC

                                app.use(require("express-session")({

                                    secret: "yoursecrethere",

                                    resave: false,

                                    saveUninitialized: false

                                }));

                                app.use(passport.initialize());

                                app.use(passport.session());

                                // reading session, encoding and uncoding for log ins (passport-local-mongoose does that for you)

                                passport.use(new LocalStrategy(User.authenticate()));

                                passport.serializeUser(User.serializeUser());

                                passport.deserializeUser(User.deserializeUser());

                                app.use(function(req, res, next){

                                    res.locals.currentUser  = req.user;

                                    // GO TO NEXT STEP

                                    next();

                                });
Alright, that is a big block of code with probably a lot of lines that you have never seen before so lets break things down a little to help out. We are basically creating a middleware that we can create a session for a user, check to see if that user is active already, and then end the user when they leave the site. This is the start to making the website dynamic. Our next step we have to start adding MongoDB into our routes and start passing through data to our views templates. We will use this code again when we start implementing our authentication and authorization in routes as we go forward in the last two parts of this post.
Connecting Models to Routes and Passing Data
This is where the fun really starts to happen. We are going to start passing our data from Mongoose into our routes and then on the next step add all the EJS tags to display the code on the page to the user. This will be a lot of code in blocks that I will exaplin as we go, but please make sure that you copy and paste exactly as I write the code since a single capitalization error will break your code. We are going to live in the services.js file. Since our servies are being served from Mongoose lets start there, and then work back to our authentication in our index file. The way I have the site planned out, our contact.js and about.js files do not need to be touched since they are common pages that you want everyone to be able to access.
New Services.js Routes
Lets add our services routes by our views templates so we can see how the data is collected or show between different views. The first route we are building is our updated GET request for our index.ejs route. The code we need is as follows:
                            // INDEX- SHOW ALL SERVICES

                            router.get("/", function(req,res){

                                // find all services

                                Services.find({}, function(err, allServices){

                                    if(err){

                                        console.log(err);

                                    } else{

                                        res.render("services/index",{Services: allServices});

                                    }

                                });

                            });
There are 2 big lines of code in here that are added into this get route and the first is the Services.find({}, function(err, allServices){. This is the first time that we reference our Services model that we created back in step 2 and have linked it into a specific route. Right now, the model is being passed into the back end of the site as we are finding all the services that we hae stored with the .find({}) method. You will notice that if you go toyourbusiness.com/services that nothing will have changed. That is because at this time there are no EJS tags to pass the data through the template yet. That will be the next step in this post! The second big change in the code you see is this line res.render("services/index",{Services: allServices});. You will notice that we are not only telling our Node.js system what template file we want to render and serve to the user, but we are passing the object allServices into the template with information from the Services model we referenced earlier.
Now lets add the Create routes, so we need one GET request and one POST request. You will see in the POST route that we are grabbing data from our submitted form by using body-parser with the syntax of var product = req.body.product;. This is telling our server to get look in the body of the request and find a field that is named product and save it the variable product. We then are passing that to our MongoDB in the variable newService
                                // GET CREATE PAGE

                                router.get("/create", function(req,res){

                                    res.render("services/create");

                                });


                                // CREATE THE SERVICE (POST ROUTE)

                                router.post("/", function(req,res){

                                    var product         =   req.body.product;

                                    var image           =   req.body.image;

                                    var description     =   req.body.description;

                                    var productNumber   =   req.body.productNumber;

                                    var price           =   req.body.price;

                                    var author = {

                                        id: req.user._id,

                                        username: req.user.username

                                    };


                                    // link dB to post values

                                    var newService= {product:product, image:image, description:description, price:price, productNumber:productNumber, author:author};

                                    Services.create(newService, function(err, newlyCreated) {

                                        if (err){

                                                console.log(err);

                                        }else{

                                                console.log(newService);

                                                res.redirect("/services");

                                        }

                                    });

                                });
We also need an edit page so we can update or change anything about a service that we have. For this we will need a GET route and then a PUT route to replace the data that we already entered from our create routes. The important part of these routes is you see how we identify the specific id for each post in our mongoose database using the identifier :id. that allows us to update the files by using the method .findById(req.params.id). This is telling monogdb to search for an id in our collection from the request paramaters that your user will request.
                                // GET THE EDIT PAGE

                                router.get("/:id/edit", function(req,res){

                                  Services.findById(req.params.id, function(err, foundService){

                                    res.render("services/edit", {services: foundService});

                                  });

                                });


                                // POST THE EDIT PAGE

                                router.put("/:id", function(req, res){

                                  // find and update

                                  Services.findByIdAndUpdate(req.params.id, req.body.post, function(err, updatedService){

                                    if(err){

                                        res.redirect("/services");

                                    }else{

                                        res.redirect("/services/" + req.params.id);

                                    }

                                  });

                                });
Last, we need the show route. This will let you display each service you have on its own page and add as much or as little additional information to the service. You will see this is a simple GET route that finds the post by its ID and then it will load all the corresponding data to pass to our show template.
                                // Show a specific service on a new page

                                router.get("/:id", function(req,res){

                                  // find posts by mongoDB ID

                                  Services.findById(req.params.id, function(err, foundService){

                                    if(err){

                                      console.log(err);

                                    } else{

                                      res.render("services/show", {services: foundService});

                                    }

                                  });

                                });


                                // EXPORT TO ROUTER

                                module.exports = router;
Ok, that was a lot of code, now lets put it in the templates and make sure that we are passing the data to the user so we can see it in practice.
Putting Your Data in EJS Tags
Now that we have connected the mongo.DB models to the routes, we need to remember that we have passed the data to our pages as the variable Services. From here we can run methods like Services.forEach() to load all our services on our index.ejs page, or you can add tags like <%= Services.price %> to display the price anywhere on your site where its been passed through. So you will notice that there are three EJS tags that we can insert into our templates. You have the include tags <% include file %>, a database refernece call with no HTML rendering <%= services.price %>, and then you have an HTML literal tag (lets your HTML code be rendered normally) that is <%- HTML CODE %>. I have created a Step 4 CodePen for you to have the exact code you need. I will break down each EJS template change for you so you understand the code (some pages will change drastically- like services/index.ejs).
Services Index.ejs
First, I have reduced the hard coded HTML to one column and one card. Second, we . To do this we need to start the for loop like this Now, inside the card you will see how we call our data from Mongoose into your EJS template by using The big change that we will see in the edit.ejs file is the new attribute value inside each of our form fields. We are going to see this code in each form field This one is rather easy, as we are just replacing the hard coded HTMl with our new EJS tags like That now has our information set up where we can start adding services to our database. If you want to make sure you code is working, load your site with In this section we are going to make 2 new views templates and then add the code in our Our Requirement statements in this route should include, express, express router, passport (for your logic) and your Users model that we created a few steps back to register users to our Mongoose Database. The required statements are as follows We already wrote this a few steps back, but this is the basic The first route is the simple We have to call 2 routes for our register routes. The first is the The last route you have to hit is a hidden route that tells our express-session to stop the session and lets passport communicate with Mongoose to end the users session so they no long have access to the pages they had in the past. This is a simple Make sure you have your Express-Router output at the bottom For authorization I love using a simple middleware object with functions inside the object for each specific authorization level I need. We are going to follow this pattern and make a middleware folder and index.js file inside of it where we can set our athorization levels. From there we are going to require it in our services.js and index.js routes so we can insert the object in the routes before the response to a request is sent. If this sounds confusing right now, when you see the code in practice it will make sense when you see it in action. The first steps are making the folder and then the file, so get to the root folder (I am still in v3) in your project and hit the command line with: The onyl requirement statement we need is for our services model which is What did we do here? We told our system if To insert our middleare in our routes our first step is to add a requirement statement at the top of our Now, we only want to prevent people from accessing We now have our middleware placed after the app.get request (that means after the request tells the server which page is requested by the user) so it can intercept the request of the user and see if it meets the middlware requiremnte before it will send back any response. It uses the middleware logic we established above to evaluate thsi question is the user logged in? If yes, then render the Yes, at this point you could launch this site live and it would be fully functioning! You would have some major security issues starting with your email address and password are accessable, all your secret authorization codes are open, and you would have to levae your computer open all the time for your database to run (not ideal), plus anyone can register and then make changes to your site. In step 5 we will squash most of those issues when we learn about <% Services.forEach(function(services){ %> directly under the grid row start <% }); %> right before the end of the grid row closing div tag.
<%= services.product %> to call the name of our service. We can use this exact same code throughout the card to replace the price, description, and then we just change the "buy now" link to say "Learn More" and change its href value to be "/services/<%= services._id %>". We now have in our index.ejs file all the Mongoose data from a service that we are going to enter after we set up our authentication and authorization methods.Services Edit.ejs
value="<%= services.field %>". Where I have field in this example is where you would add your product, price, image, or any other field that we have in our database. The Step 4 CodePen has the entire form completed for you (you can copy it in its entirety or just use the few lines of code you need). Also, at your form opening HTML statment needs to now be . We are using method-override to Post the updates from a put route to our database. The value tags will load any data that you save in Mongoose in advance so its easy for you to see what data is already there.Services Show.ejs
<%= services.product %>. We just need to replace the product, price, product number, and description in this template and we are ready to go.node app.js and if your services page comes up blank then you are in good shape. Since we are requiring a user in your post, you will get an error if you try and create a service now. Lets go write the code to make authenticate a user so we can test making a few products.Authentication
index.js route to login, logout, and redirect users based on successful or unsuccessful authentication. So first things, lets make thsoe two new views that we need, login and register. We just need to hit the command line with touch views/login.ejs views/register.ejs and then jump in and add the forms on each one. I have the Step 4 CodePen updated with these two forms ready to go. Paste the code in the corresponding file and then lets get into the index.js route to get started making the authentication go to work.Requirement Statements
// REQUIREMENTS
var express = require("express"),
router = express.Router(),
passport = require("passport"),
User = require("../models/user");
Landing Route
GET route for the landing page. Paste this below your require statements if it is not already here.
// LANDING
router.get("/", function (req, res){
res.render("landing");
});
Login Logic and Routes
GET route to load the page. The second POST route is the passport logic to authenticate with our local strategy we outlined in our app.js file at the start of this lesson (you can see how passing the data between the router is paramount in web apps now), and then asks us based on if its successful or unsuccessful login where it should direct the user to go. I have set us up going to our services page if successful and an unsuccessful login lands you back at the login page to try again.
// LOGIN PAGE
router.get("/login", function(req,res){
res.render("login");
});
// LOGIN LOGIC
router.post("/login", passport.authenticate("local", {
successRedirect: "/services",
failureRedirect: "/login"
}) ,function(req, res){
});
Register Logic and Routes
GET route for the users to be able to view the page, and the second is the POST route that will collect the data from the form and pass it into our Mongoose Database. From the form we are first going to create a new user, and then, second, store that username in our database. Now, I know a lot of people are going to want to know where does the password get stored from all this code? The interesting thing is that passport, passport-local, and passport-local-mongoose don't actually every display this password in the database, instead they use a randomly generated salt and hash to compare for the login authentication. For the purpose of this site, we are only going to use the registration route once and then disable it so that no one else can come in and edit your site, but its imperative that you learn this code if you plan to ever have a website that has multiple users that interact with your site.
// REGISTER LOGIC
router.post("/register", function (req, res){
var newUser= new User({username: req.body.username});
User.register(newUser, req.body.password, function(err,user){
if(err){
// DISPLAYS PASSPORT ERROR
console.log(err);
return res.render("register");
}
passport.authenticate("local")(req, res, function(){
res.redirect("/services/new");
});
});
});
Logging Out
GET request that uses a built in passport method req.logout() to physically log the user out.
// LOGOUT
router.get("/logout", function(req, res){
req.logout();
res.redirect("/");
});
module.exports = router; and you have sucessfully created your authentication logic and registration routes. This is the biggest step in this section, so congratulations on offically making your site fully dynamic. Now, if you want to create a service or two for yourself to see, you can do this now! If not, lets get on to authorization and the middleware we need to make this happen.Authorization
mkdir middleware
touch middleware/index.js
var services = require("../models/services");. Then we need to declare the middleare object that we are going to build like this var middlewareObj = {};. Now we can build the specific function that we need to check if someone is logged in before they can acces an edit or create route (You don't want people messing with your prices and products right?). lets build out this function and then explain the parts so you can see in action what is happening.
// Is logged in
middlewareObj.isLoggedIn= function (req, res, next){
if(req.isAuthenticated()){
return next();
}
res.redirect("/login");
};
middlewareObj.isLoggedIn is called in any route check and see if the user is authenticated before going to the next part of the request and response action (what ever route is requested passing in next() allows us to use that variable function to move forward). If req.isAuthenticated() fails, then it tell your app to stop the progress of that request and send the user to our login page that we created to authenticate themselves.How Do We Use This In Our Routes?
services.js file since it contains the routes that require authorization. Put this require statment at the bottom of your requirement statements: middleware = require("../middleware");. This has now passed the middlewareObj we have just made and we just now need to place it in our routes that we want to intercept and authorize specific users to that page./services/edit or services/create routes, which means we have to add middlewareObj.isLoggedIn in 4 places (the GET request to load the pages and the POST and PUT for each the edit and create services page). To see how we inject our middleware we are going to use the services/create GET request to show the placement.
// GET CREATE PAGE
router.get("/create", middlewareObj.isLoggedIn, function(req,res){
res.render("services/create");
});
services/create template. If no, then stop and force the user to go to the /login template. Add the same middlewareObj.isLoggedIn in the 3 remaining routes we need to lock up (POST route for create, and the GET and PUT route for edit routes) and we are done with authorization. To test your authorization and authentication try and access your /services/create page without loggin in first. If you get redirected then you are in business!Wait, Is This Site Ready To Go Live?
process.env.Variables and running Mongo Atlas so you are live 24/7. See you next time!