Create Your Responsive Web App
Step 1: The Dev Environment and Basic Routes
Hello everyone and welcome to our first step in creating your responsive web app for your business website! This first post will start with the basics of getting your AWS C9 environment started and getting you through your first few GET routes to show you how the app functions. One Small Disclaimer: I am using some prefixed UI design code from MDBootstrap in order to speed up the CSS/jQuery layouts to save you time. I would suggest that you get one of their bundles as it will greatly help you save time in future builds and make your sites look extremely professional without hours of custom CSS/JS coding. Now, Lets get started!
AWS C9 Account- Why C9 and Creating Your Account
Why C9?: Its an online, portable NodeJs development environment that lets you build your full MEAN stack web app in one online portal that you can access anywhere, share with other developers and show your clients their sites in an active live state without having to load the site on a local server from your personal computer. But wait, my computer has 32 GB of RAM and a extrememly fast processor, so why wouldn't I want to show my clients work from my computer locally? To me, working in a dev environment that is as close to deployed environment is critical because understanding how your code loads and works can drastically change the final SEO score from Google and other large search engines.
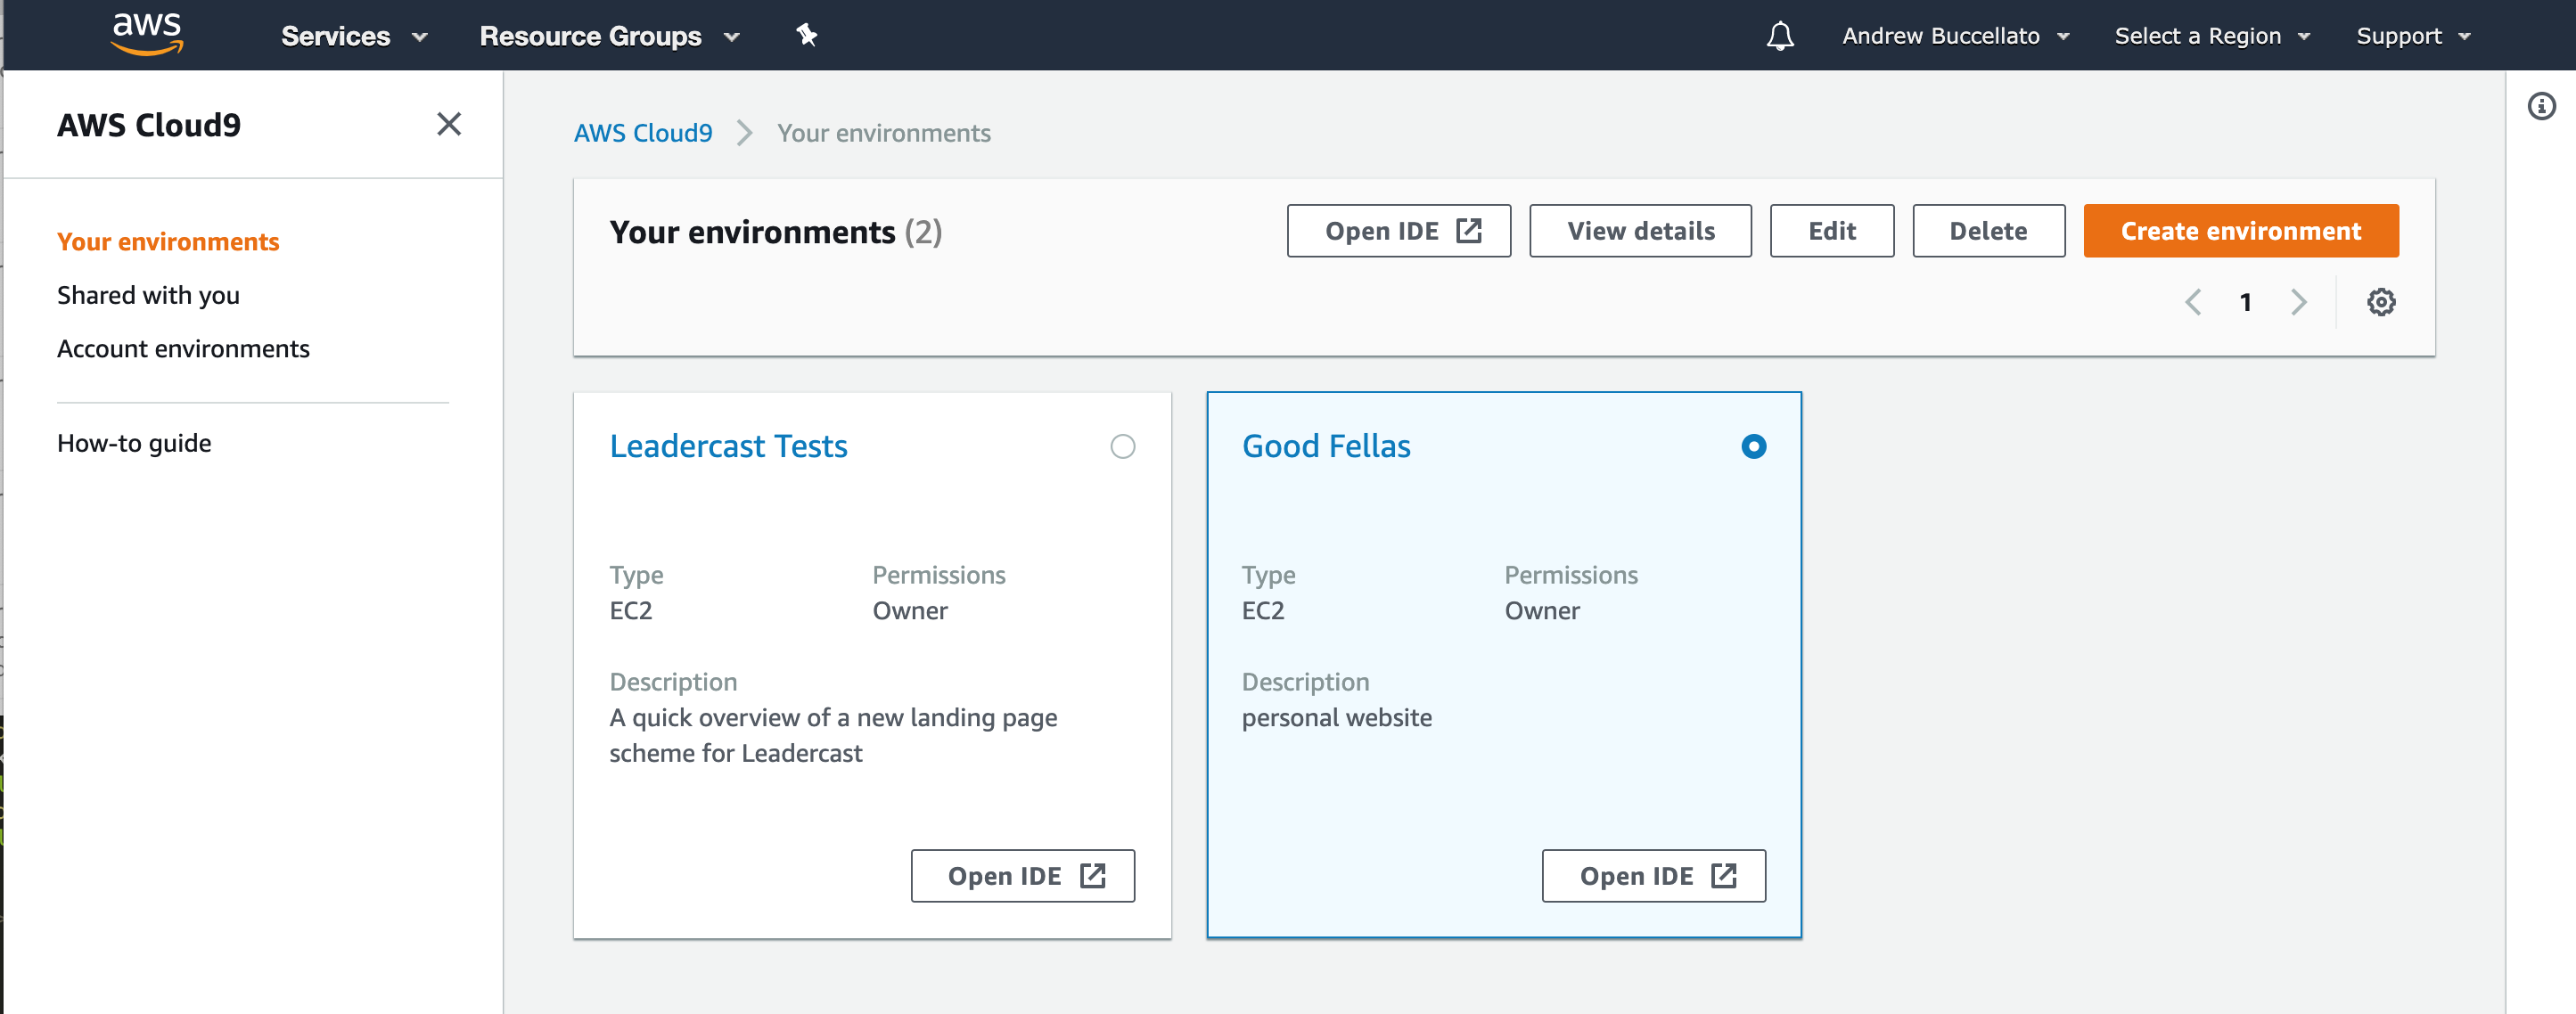
Lets Make An Account: Go to https://aws.amazon.com/cloud9/ and click create an account. Fill out all the information and it will take you to your dashboard. You see below I have my personal business website, and a client site I am developing here.
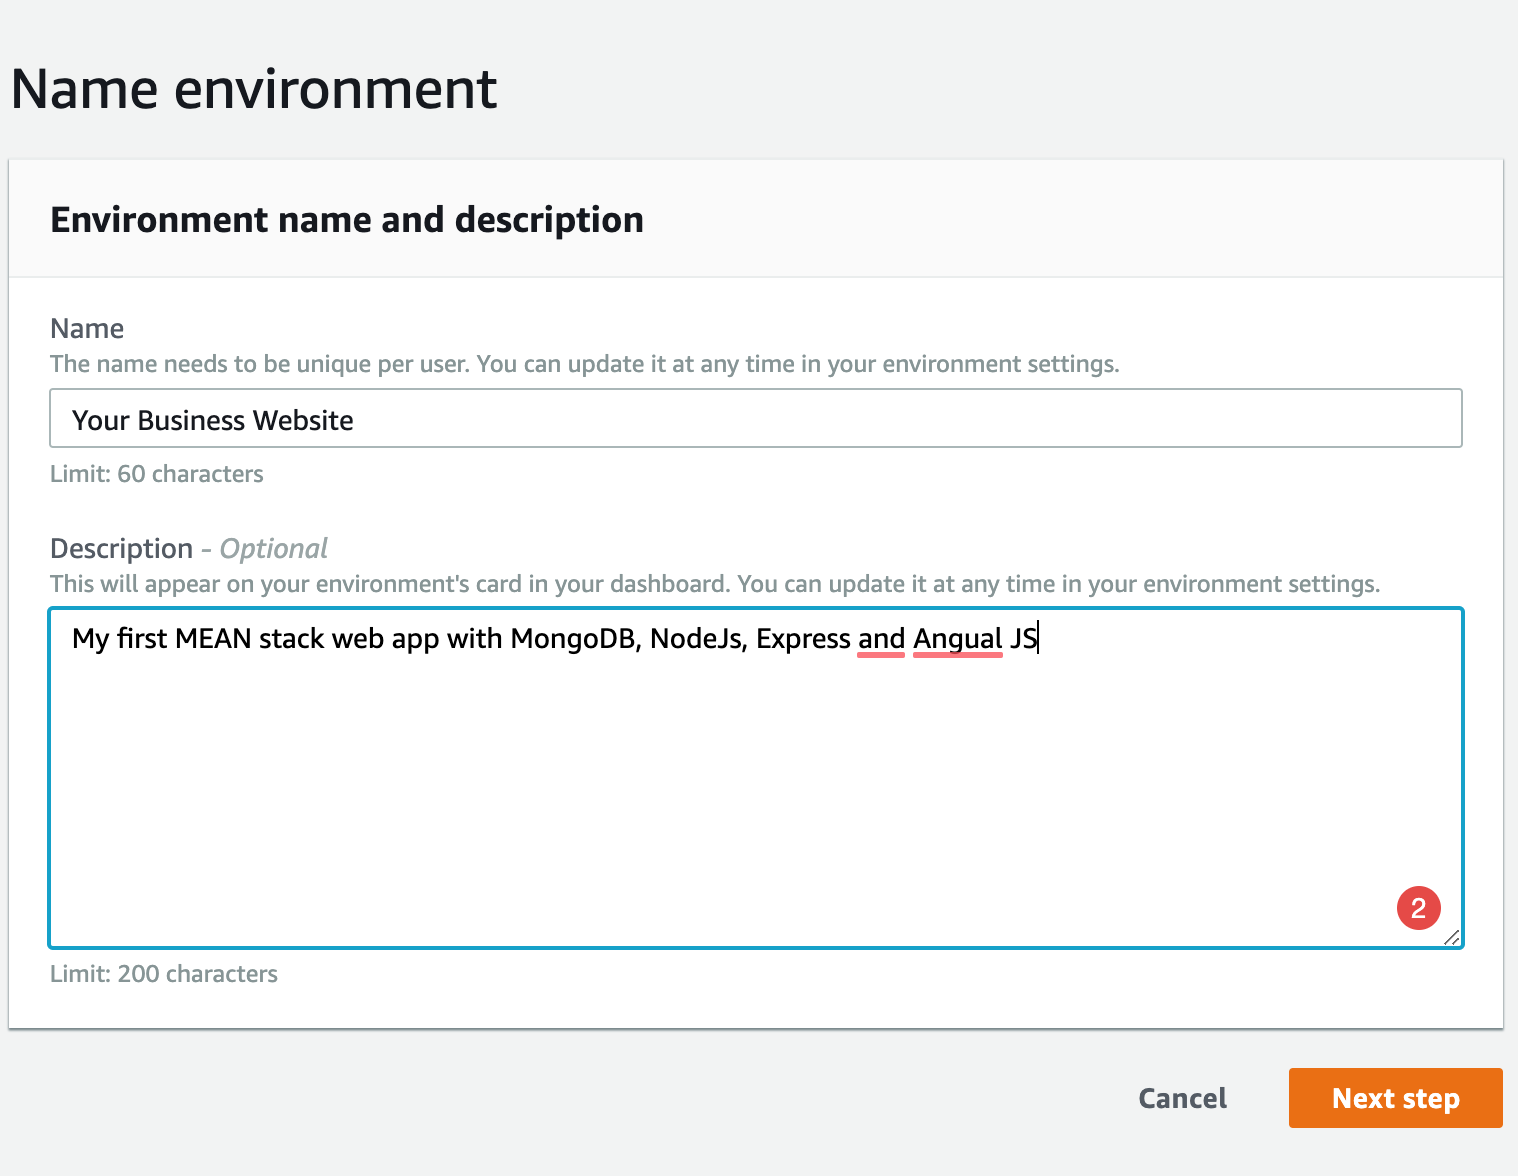
Create a new enviornment: Click the orange button on your dashboard, name and describe your project, and then use these settings to create your first dev environment in C9:
Click Next Step in the settings screen.

Click Create enviornment at the end of the preview screen. You are now in your dev enviornment! Now lets get learning the code and how it works.
NPM, Express and your App.js File
Before we get into the code I want to set up a few things for everyone so you know 1. What you are installing and working with, and 2. Why I do it this way.
So, What are NPM and Express? NPM stands for Node Packet Manager and its the foundation of your Node JS site. It will compile everything for you on the back end at your server and allow you to install small, custom packages to complete your specific needs within your site. Express is a lightwight framework that puts all those packages together and tells the server how to render your site based a users request.
The Command Line and 3 Commands You Have To Learn: For me, the command line is one of the most powerful tools you have at your disposal. At first it will be intimidating, but I will tell you from personal expreience once you play with it and get used to its functions it will save you hours of time. There are 3 big commands I want you to learn and they are:
- cd: This command allows you to move up and down your file tree. Typing in
cd ..(the space is required between cd and your directory target) will move you up a level while typingcd views/partialswould drop you directly into the partials folder in your code. - mkdir: This command lets you create directory folders anywhere in your enviorment. I love using this command to make a folder nested inside another before I have to start working on a file there. It is used like this:
mkdir viewswould create a folder named views. You can create multiple folders at a time by putting a space between each folder you want to create. For example:mkdir views views/partials publicwould create 3 folders- a views folder, a public folder, and a partials folder inside of the views folder. - touch: This last command creates files for you to work with and it operates the same way as your your mkdir command works. Create a single file by typing in
touch views/header.ejs(create a header partial in your views) or make multiple files at a time by putting spaces between the filestouch routes/blog.js routes/index.js views/index.js
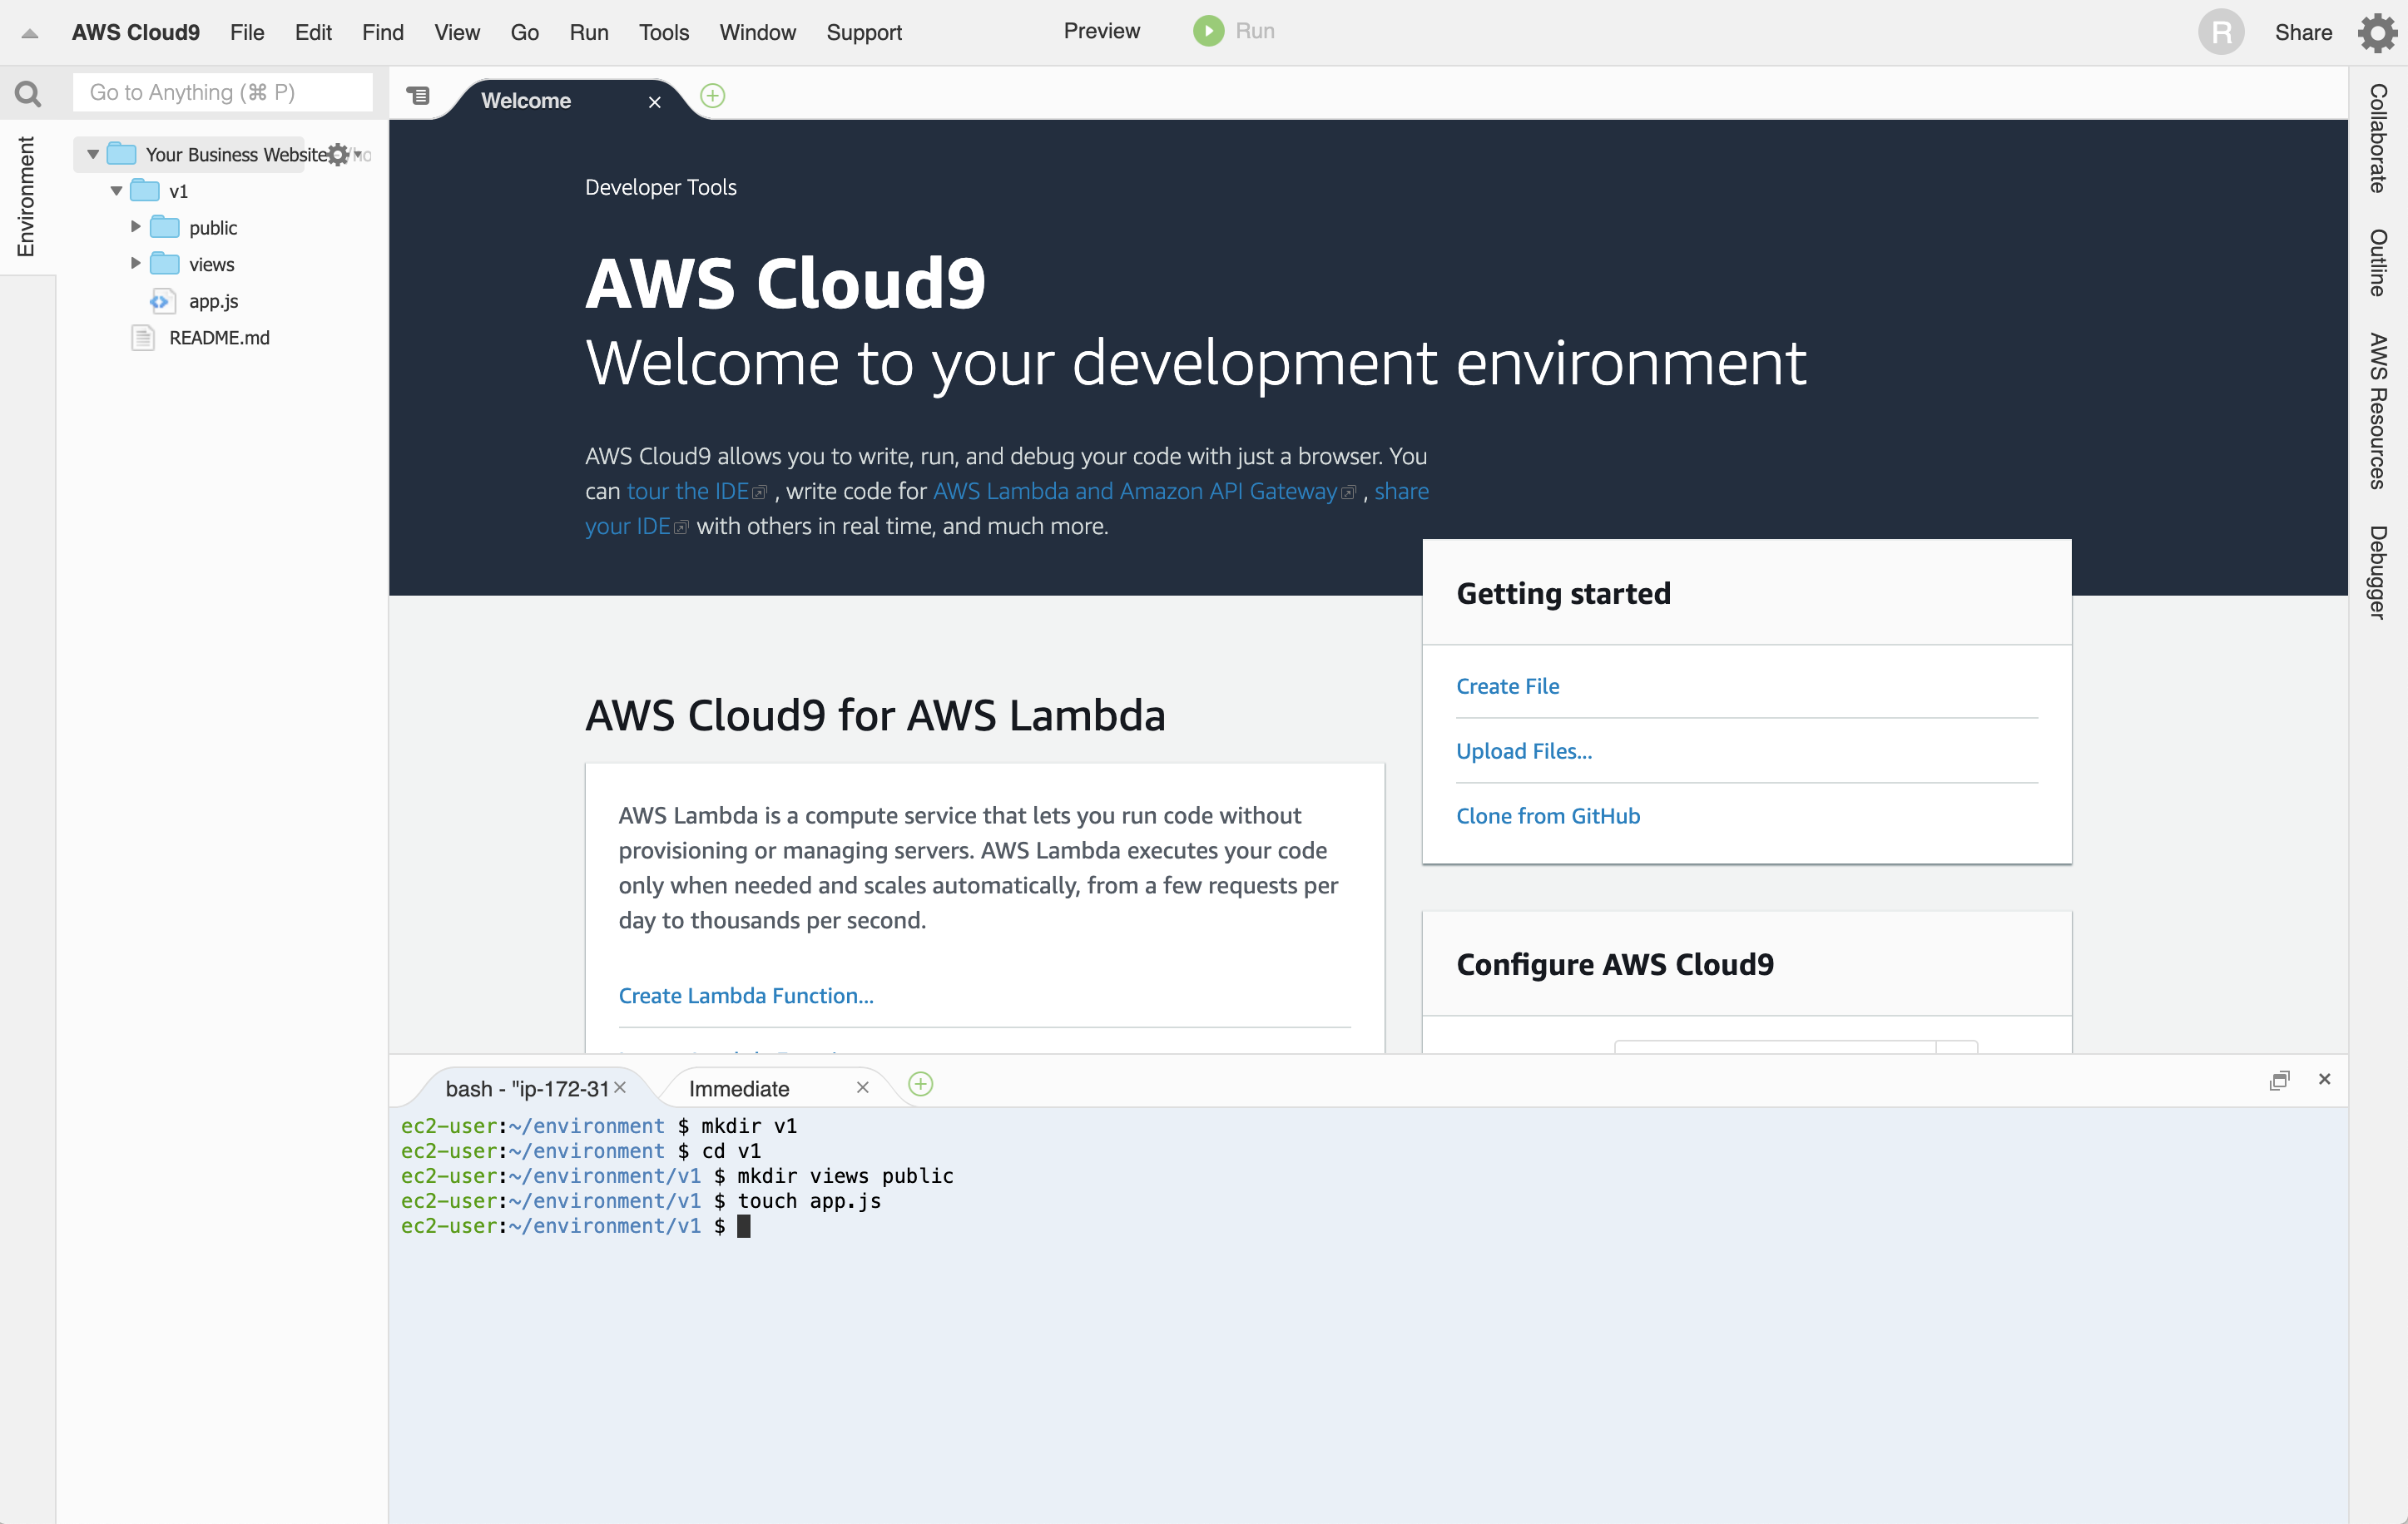
Setting Up Your File Tree: In your command line you need to create your project container, a views folder and a public folder. So hit your command line with these commands in this order: mkdir v1 cd v1 mkdir views public touch app.js. Congrats, you just created the container folder v1, and inside it you created your views and public folders and your app.js which is the foundation of your app. You should have a directory tree that looks like this now:
 Now, lets install NPM and Express and get you started in your code:
Installing NPM: type in npm init and then enter information as it asks (I do not use every field! Name, Version, Description, Main, Author are the only required ones) Click enter on the last line and it will create your package. I used the following setup for my app:
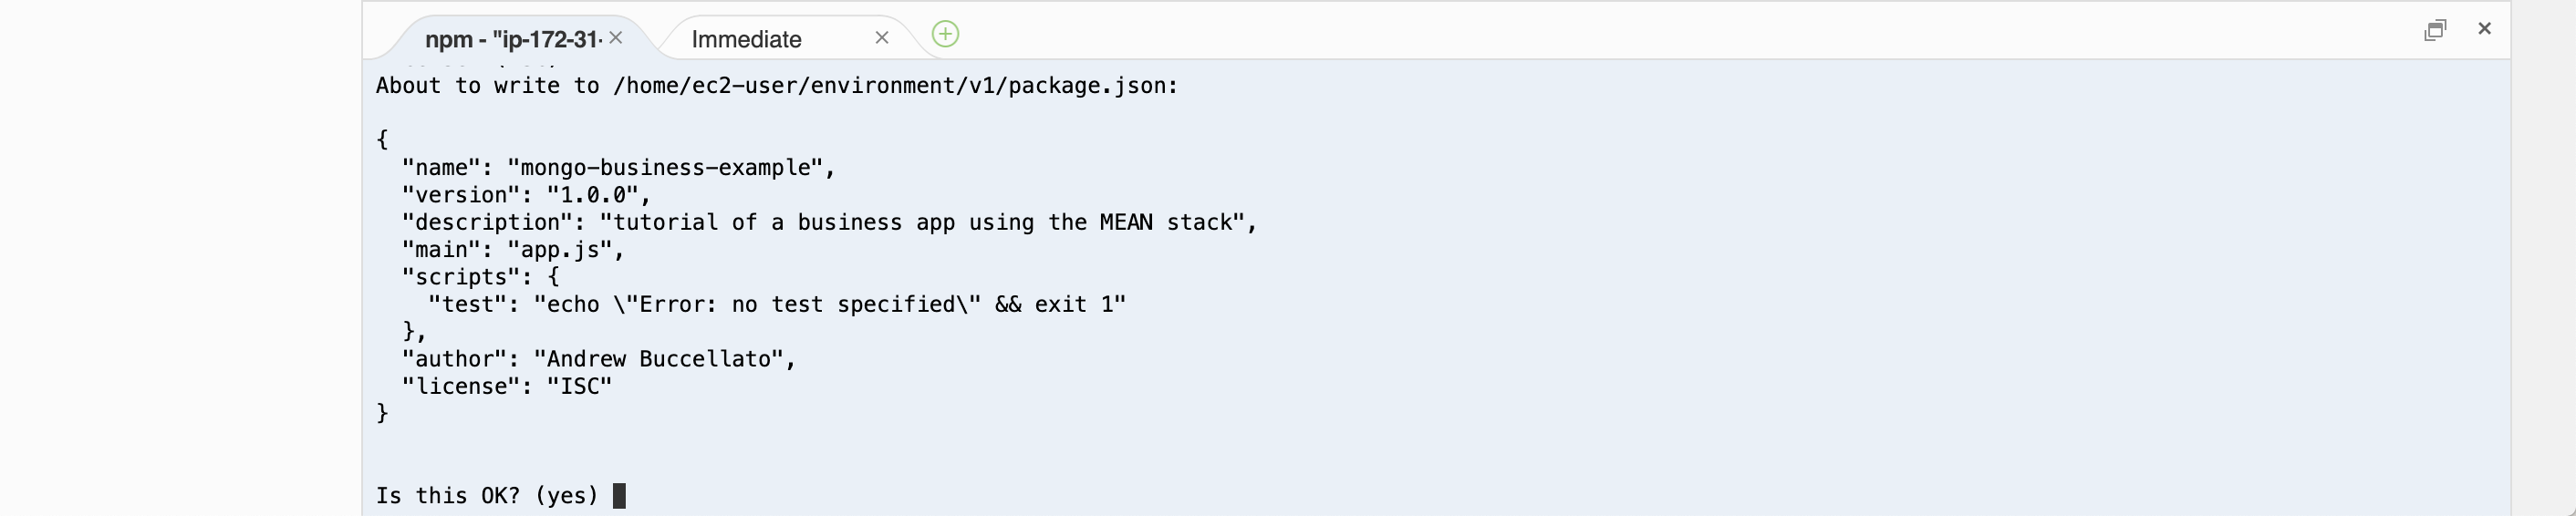 You should see a new file pop up in your file tree under your
 app.js named package.json. If you see that file you have succesfully installed NPM!
Install Express.js and EJS: in your command line type in npm install express EJS --save. This line installs Express and EJS in your v1 file and you should see a new folder node modules created. Warning: If your C9 creates a package.json-lock file you can delete it.
Now lets open up our app.js file and lock in express to run our app. To do this you need to add two lines of code at the top of your app.js file (open it by double clicking on it):
var express = require ("express");
var app = express();
app.set("view engine", "ejs");
app.use(express.static(__dirname + "/public"));
app.use(express.json());
app.set("view engine", "ejs"); tells express to know that .ejs will be the default file type, so when building your routes you do not have to type the file extension every time. The second line app.use(express.static(__dirname + "/public")); tells Express that the public directory for you CSS/JS/IMG files are for when you reference them in your headers/footers. The last app.use(express.json()); will work with a future packet to help parse data from forms and APIs.
Make sure to save your app.js file by hitting CTRL + S in Windows or ⌘ + S on a Mac. Now lets move to Folders and your file tree, click Next below to move forward.
Folders and Organization
Why Public and Views?In the last step we created two folders, Public and Views. These are very important becasue they are defualt names that Express looks for within your app. The Public folder will hold all your CSS, JS, and image files, while your views will hold the templates that Express will render for your users requests.
Organization: lets create 3 folders in our Public Folder that keep your CSS, JS, and image files separated so its easier to use. Hit the command line with these 2 lines of code (you could combine them into one if you like);
mkdir public/assets
mkdir assets/css assets/js assets/img
assets inside your public folder, and 3 subfolders css js img ready to accept your individual file types. I am going to drag and drop my files inside the correct folder and you will see them inside the folder tree ready to be accessed by our app.
 Perfect, now we have everything ready to go to start working on our routes and how to call and display your routes to your users. Let's move on to step 4.
Build Your Basic Routes
What Is A Route?: A route is a defined path in your app that a user requests. It is essentially the HTML URL structure your website. For example, as you read this blog at www.goodfellastech.com/blog you requested my /blog route and it rendered my /blog/index.ejs file.
How Do I Call A Route: The simpliest way to call a route in Express is as follows:
app.get("/", function (req,res) {

                        res.render("index");

                    });
app.getAs we went over in step 2, we defined our app variable to be Express framework, so this is telling your Express app to use the HTML verb GET to find the route that is about to be defined.("/",In this example, I requested the root domain or the landing page of your site.function (req, res){This is express syntax to say based on the users REQUEST (req) to RESPOND (res) with a specific file in your views directory.res.render("index"):}):This is telling express, based on the request above, to render the index.ejs template file in the views directory.
app.set("view engine", "ejs"); statement we made in our app.js file. It might seem small now, but going forward you will see the beautify of not having to define the file type at every single route.
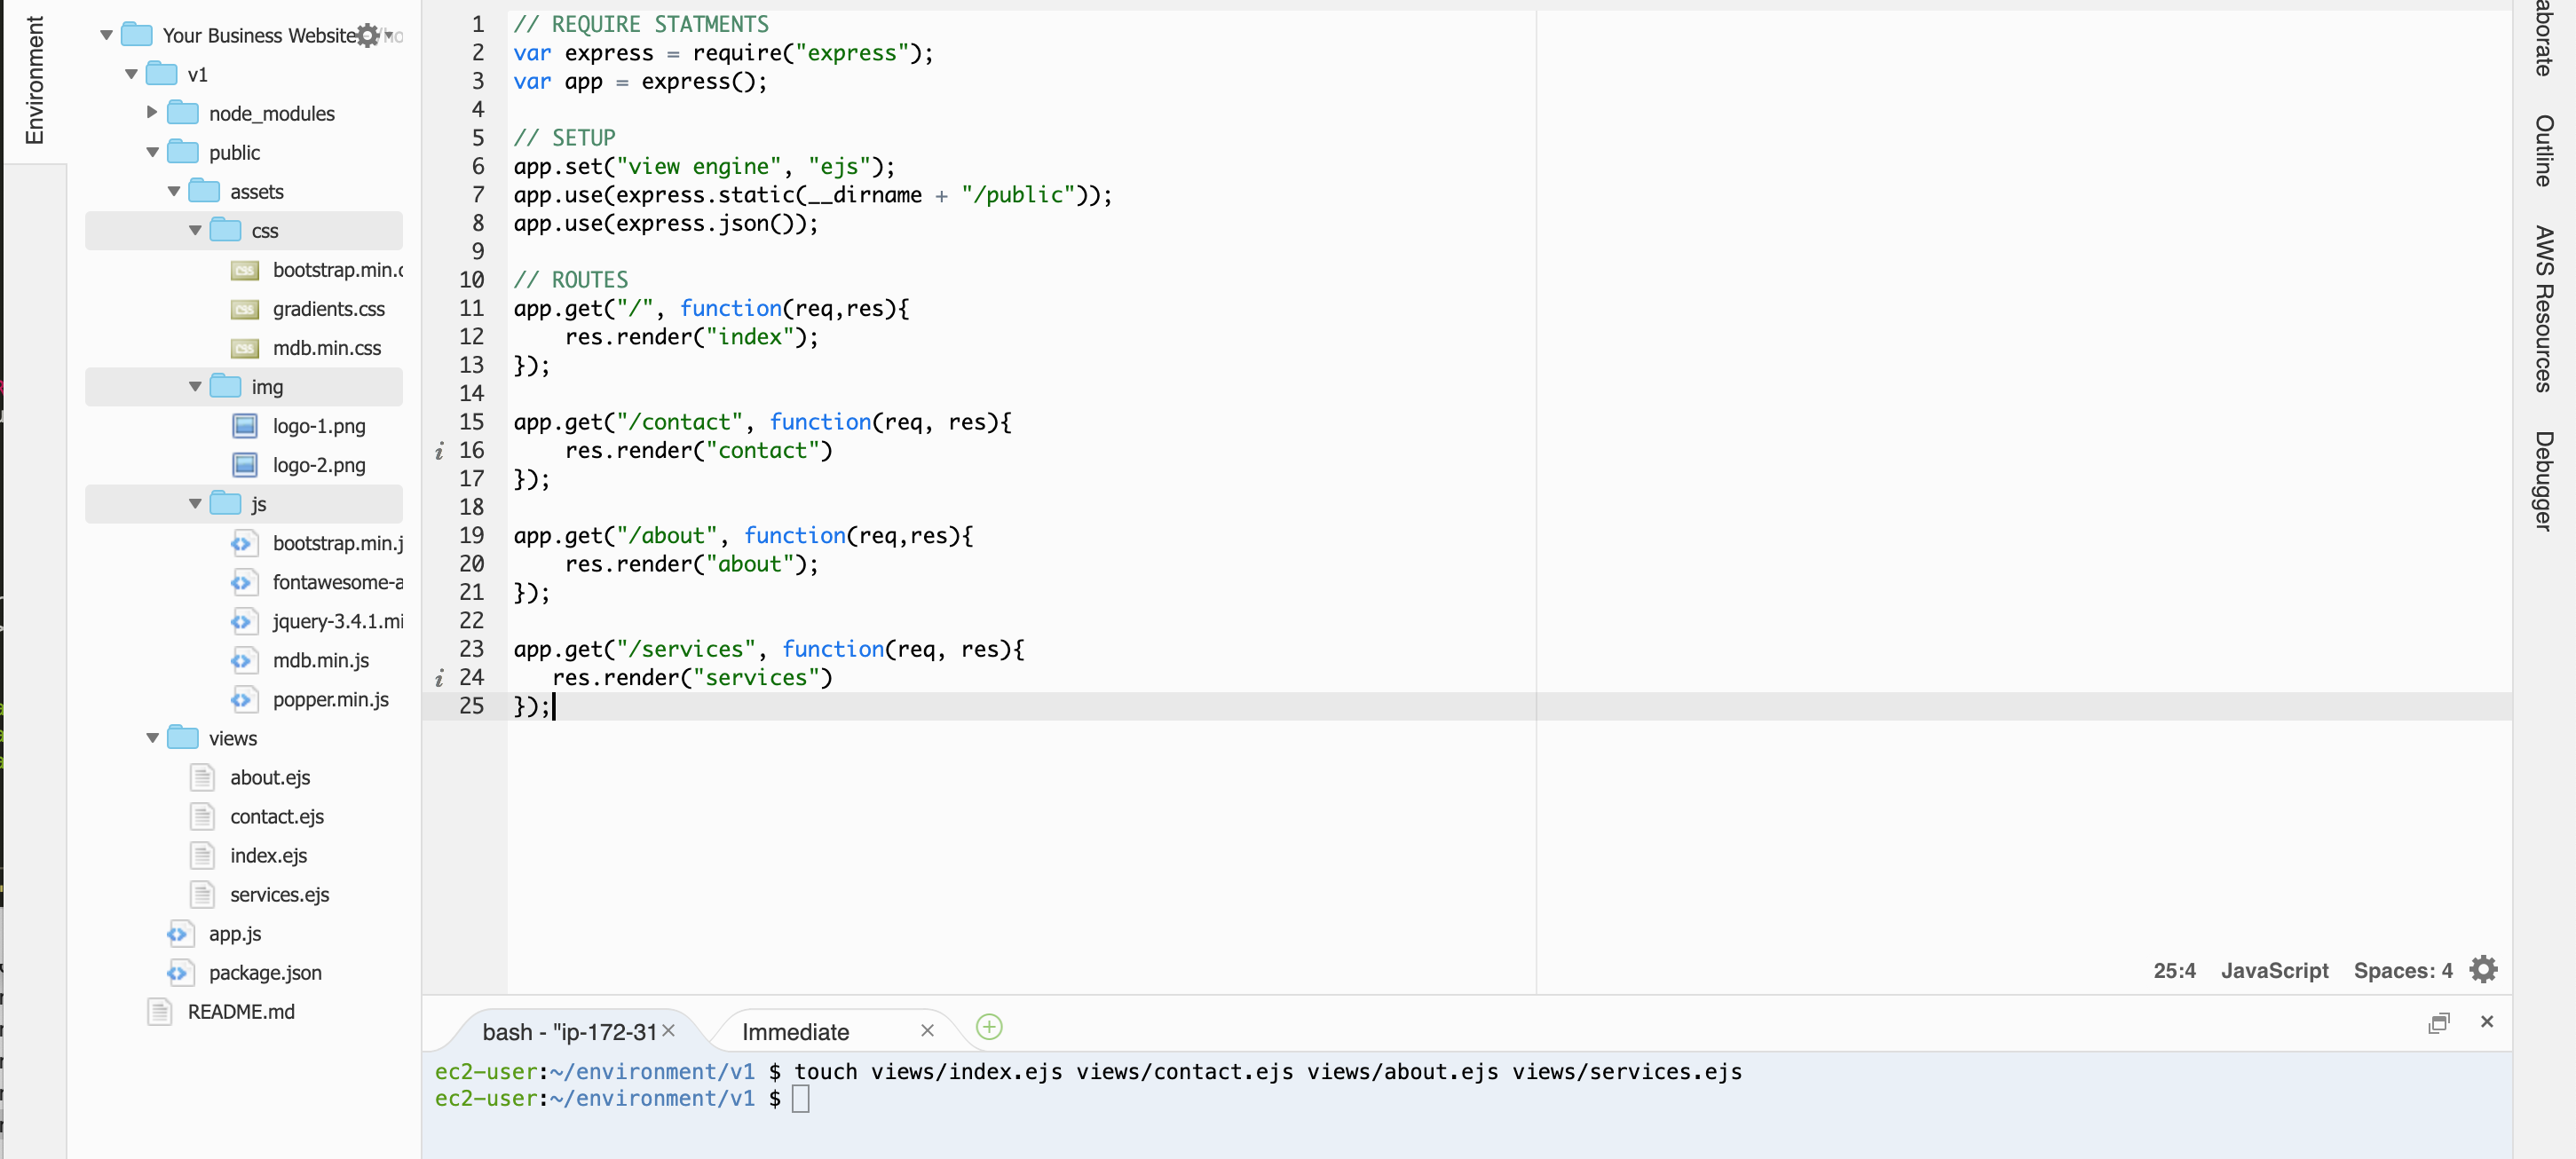
Create Your Routes: Let's make 4 routes in our app.js file for your index, contact, about and services since these are the core pages almost every business application will have. The code looks like this:
                        app.get("/", function (req,res) {

                        res.render("index");

                        });

                        app.get("/contact", function (req,res) {

                        res.render("contact");

                        });

                        app.get("/about", function (req,res) {

                        res.render("about");

                        });

                        app.get("/services", function (req,res) {

                        res.render("services");

                        });
touch views/index.ejs views/contact.ejs views/about.ejs views/services.ejs
 The last step we have to cover to let Express and the C9 environment be able to run your app with your routes is add a Port Information Statement. Use this one to make sure you don't have to change it even when deployed live:
app.listen(process.env.PORT, process.env.IP, function(){

                        console.log("Server Has Started!!!");

                        });
console.log("Server has started!"); line because it makes it easier for me to know what is going on. The next section adds HTML into our templates and starts working with partials to save you time. Lets move on
HTML In Your Templates And Partials
I am going to take the position that everyone doing this series and working on their own app understands how HTML works so I am going to use some preset code from MDBootstrap to speed up this process so that we can focus more on the fuctionality of Node rather than what the HTML means. Lets start by getting the header area set up on the index.ejs template.
Open your index.ejs template by double clicking on it in the file tree. Copy and Paste the repository files.
Last step is adding a test line of code like This is the index route
tag so your index.ejs file looks like this:
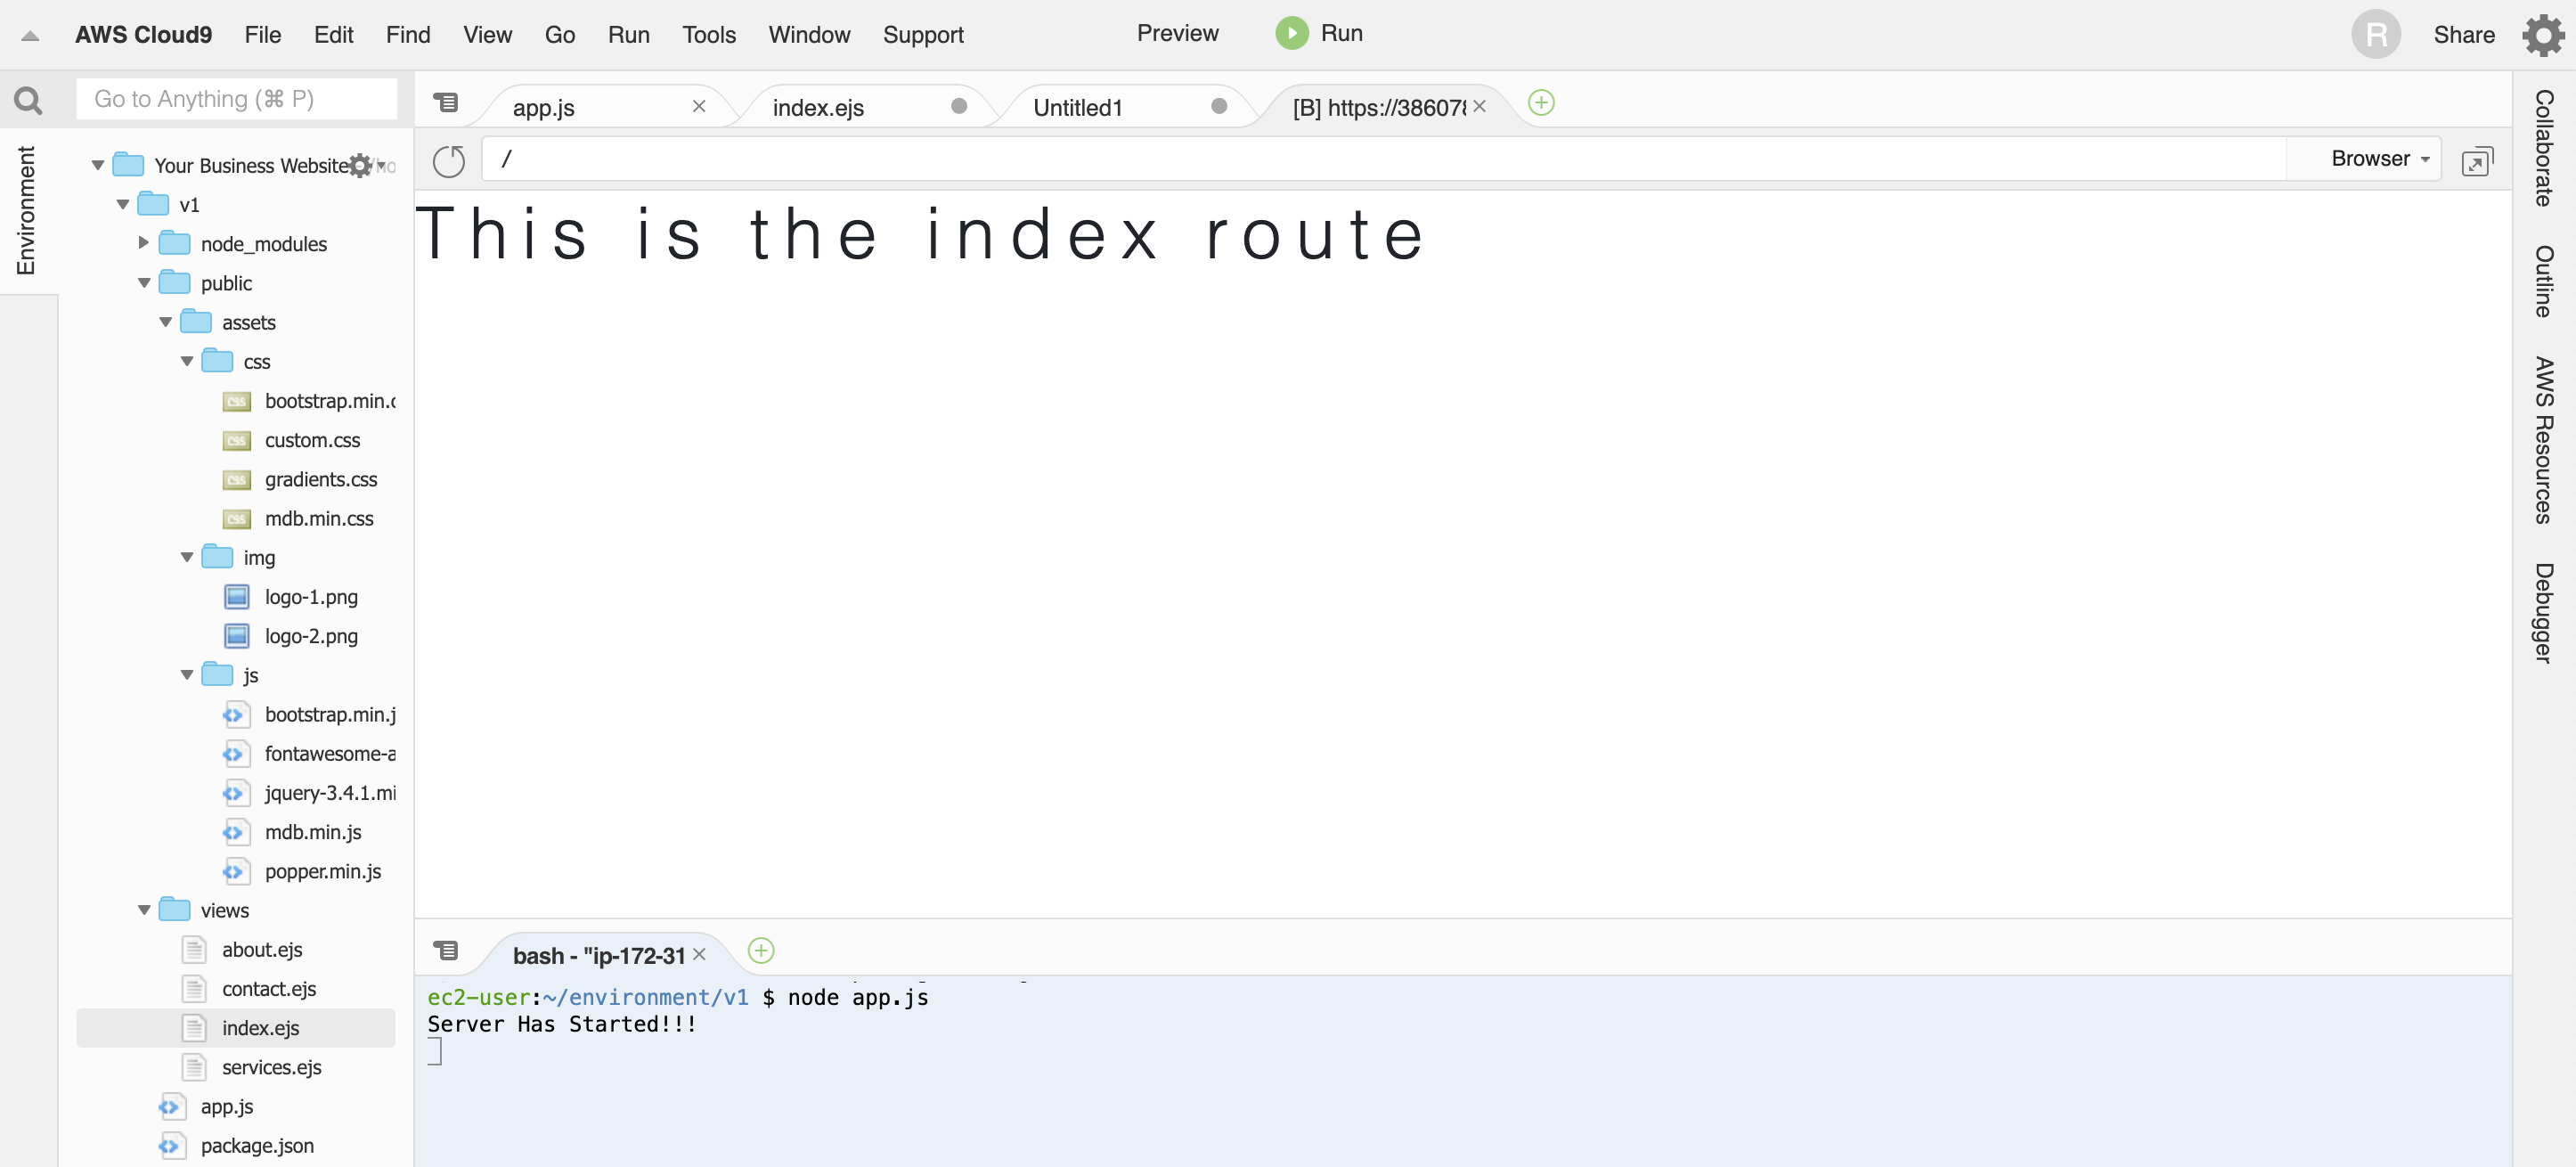
 Make sure you save your app.js file and index.ejs file now, and then go to you command line and type in
 node app.js and hit Enter. This will tell C9 to start running your app. If you see the console add the "Server has started!!!" directly under your node app.js command, your app is running in the background. To launch the live view of it, click on Preview and select Preview Running Application. It should only display your H1 code This is the index route. If it does, then you have sucessfully triggered your index route!
 To exit out of you app and free up your command line type CTRL + C to stop it from running so you can use your command line.
Now lets fill out some content on each of the pages so it looks like an actual website that someone would vist. Copy and paste the starter code from your index.ejs file to your contact, services, and about files. This will make sure that all of your templates route your CSS, jS, and image files to your public directory so you can code as you want. I am using the following sections to fill out the content of the files (some are MDB pro and require a license- to get a license go here:
index.ejsFile: Go to MD Bootstrap and copy the HTML of the minimalist template and paste it immediately below the closingtag. Make sure you create alanding-custom.cssfile in your assets/csss folder to accommodate the specific css that template needs.contact.ejsFile: Go to MD Bootstrap and copy the HTML of contact version 1 and paste it immediately below the closingtag. Add the corresponding css to acustom.cssfile in your assests/css directory.about.ejsFile: Go to MD Bootstrap and copy the HTML of contact version 1 and paste it immediately below the closingtag. No additional CSS needed.services.ejsFile: Go to MD Bootstrap and copy the HTML of contact version 1 and paste it immediately below the closingtag.
node app.js and I want you to notice something: Only your index.ejs template page should look right (YES, I did this intentionally!). Everything else should look goofy and unorganized (scroll down on the other pages /contact, /services, /about to find the actual HTML content). I did this because we are going to refactor out patrials that repeat on every page and I want to make sure you notice your CSS specificiy that is duplicated across all pages but was only needed for the full screen landing page. Lets start cleaning up all the errors you have right now in a few steps.
Partials- How They Work and Why Use Them: The first step to solving some of our problems is through partials. Partials are code that repeats on all your templates that you can bundle into one file and then server with an include statement in each template. It is considered a best practice to always use DRY coding- Don't Repeat Yourself. I am going to create partials that are the header information from above and a navbar that we are going to use across the site. We can then load it on all our template files from now on and know our navigation is already complete. I am going to create 2 files landing-header.ejs and header.ejs because as I stated above there is a specific HTML tag that is needed for the landing page only.
Partials stay in the views directory so we need to run 2 lines in command line to make the partials:
                            mkdir views/partils

                            touch views/partials/landing-header.ejs views/partials/header.ejs
index.ejs and paste it in the landing-header.ejs file, change the line that reads index.ejs file you need to now put this include statement at the top: <% include ./partials/landing-header.ejs %>. You will notice two things about this statement that are very important:
- We have introduced the EJS tags
<% %>to insert the header into your template. - The
./before the partials tells Express to go up to the parent folder (views in this case), then find the partials folder where youlanding-header.ejsis located.
index.ejs file and your partial and the run node app.js. If nothing changed then you successfully installed your first partial.
CHALLENGE: See if you can create the second partial for the services, about, and contact pages and change your links to match your routes in the HTML for both partials (HINT: use your route path to figure out the Href values of the a tags), AND create the footer partial.
Bonus: See if you can figure out how to add a container around the content of page without affecting your navigation or footer.
I want you to learn a little on your own, since there is no better way to learn than to dive in and play with the code. I'll post the exact partials (both header and footer) code I use on Monday so if you can't figure it out you have a good starter template.